Transmission Swap (going from 4spd auto to 5spd manual)in my ’90 Chrysler LeBaron 3.0L V6)
I had to purchase the following:
Junk yard:~$400
Transmission
Fly Wheel(if you’re lucky you can get the clutch assembly, for a core return, from the yard)
Shifter & Cables(assembly make sure you get the bushings and retainer clips for the shifter cables)
Brake/Clutch pedal with clutch cable(assembly make sure to get clutch cable retainer)
Dealer:~$80
Fly Wheel Bolts(8)
Pressure Plate Bolts(6)
Transmission Mounts(2)
Auto Zone(or preferred auto shop):~$150
Clutch Kit(clutch, pressure plate, bearing, alignment tool)
Brake cleaner(to clean pressure plate and fly wheel contact surfaces)
Thread Lock(Make sure them fly wheel bolts don’t come loose)
It took me 4 days @ 8hrs/day to complete the project.
Open hood. Take a big breath and dive in. Remove Battery, battery tray, cruise control, air intake box & hoses. Once again take a big breath and make sure you want to do this swap. Empty the radiator and remove the hose that runs next to the battery.
Lift front of car and support with jack stands(the higher you have it the easier it is to get at the trans. Also the higher it is the higher you will have to lift the trans.) Remove Front wheels. Remove Axle Nuts(my car required an impact wrench and a 32mm Deep well socket). Separate brake, hub assembly from ball joint(Take out retainer bolt and use a pry bar to push the lower control arm down off the assembly). Put a catch pail under the tranny where the axle enters it(trans oil is nasty to clean up). Gently pull axle out. Now do the other axle.
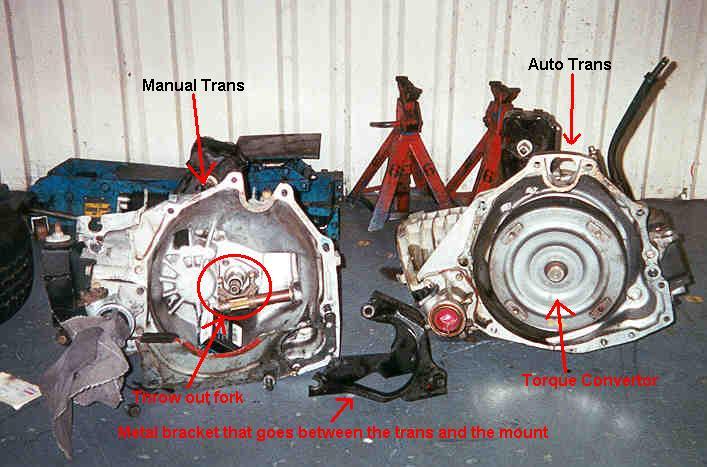
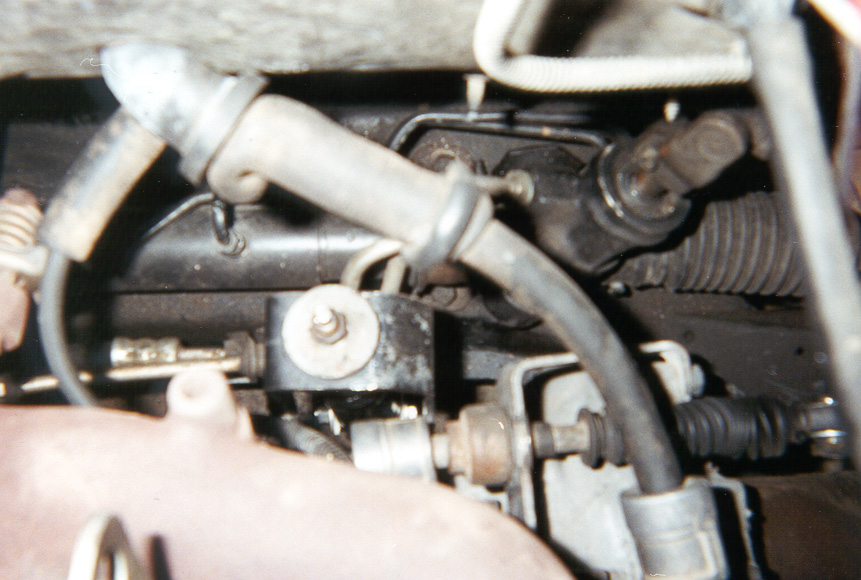
Support engine/tranny with a jack and remove the transmission mount(you have to pull a plug out of the drivers side wheel well to hit the bolt that goes through the mount). Once this is loose remove the starter and the front mount(you might have to lower the motor/tranny a bit so you can get it free).
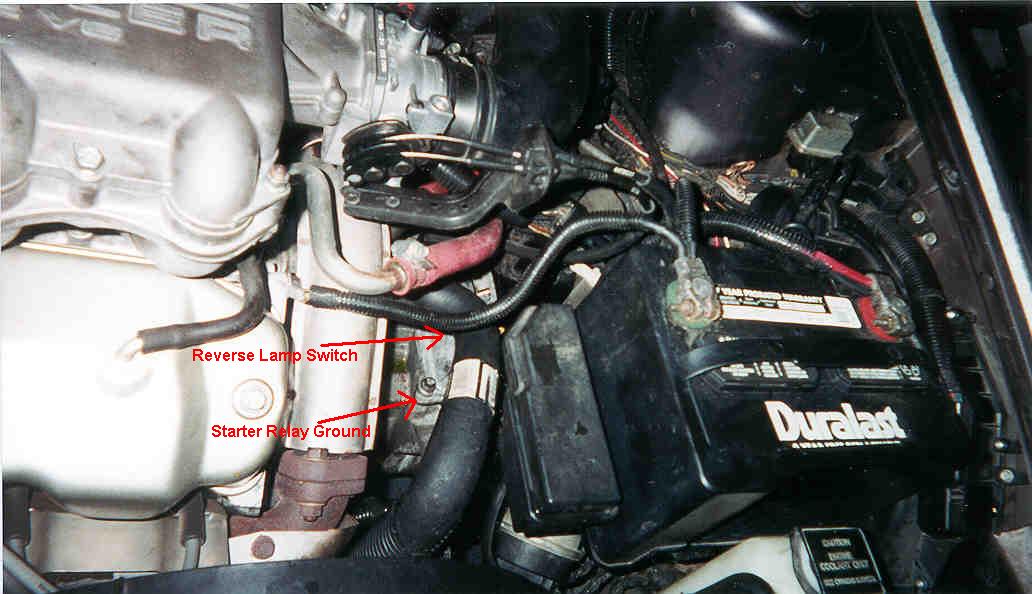
Take free all the sensors and the gear selector(double check to make sure you got them all off).
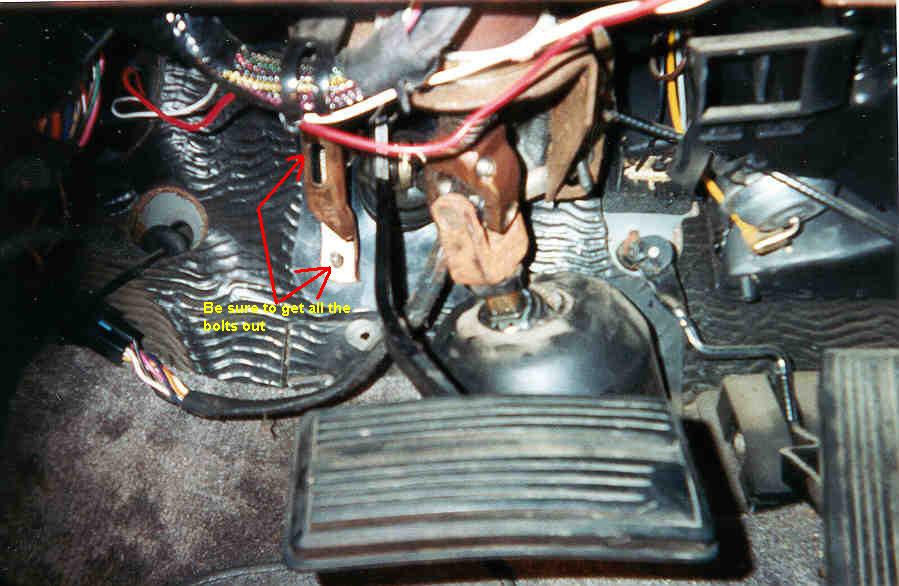
With the engine and tranny supported take off the torque converter/fly wheel cover and remove the bolts that hold the converter to the flywheel(Take out one bolt and turn the motor till you can get the next). Make sure you get all the converter bolts out!. Now take out the rest of the bell housing bolts. There are two bolts on the upper bell housing that hold the coolant pipe onto the motor. Just pull that loose once you get the bolts out. Be careful the auto tranny weighs a TON! It might be a good idea to have someone help you steady it while you take the bolts out. If you have a transmission jack(a floor jack with a ~1ft sq. plate on it) it will be a bit easier. Just allow the jack to support the tranny. Once all the tranny bell housing bolts are out the trans pretty much falls out(mine did, thud dooohhhh:-). Now push/drag/pull the trans out of the way(might need a friend for this too, I’m a pretty big guy and could barely lift it a couple inches of the ground).
Put the new shifter in and bolt it down. You will have to drill a new hole in the fire wall for the extra shifter cable that will pass through it. I put mine about an inch up and toward the drivers side from the existing shifter cable hole. Start with a small hole then grab the biggest drill bit you can get your hands on to open it up. Slip both the cables through the holes and then crawl under the dash and feed them through to the shifter. They have different connectors on the shifter side so figuring out which goes where is pretty self-explanatory.
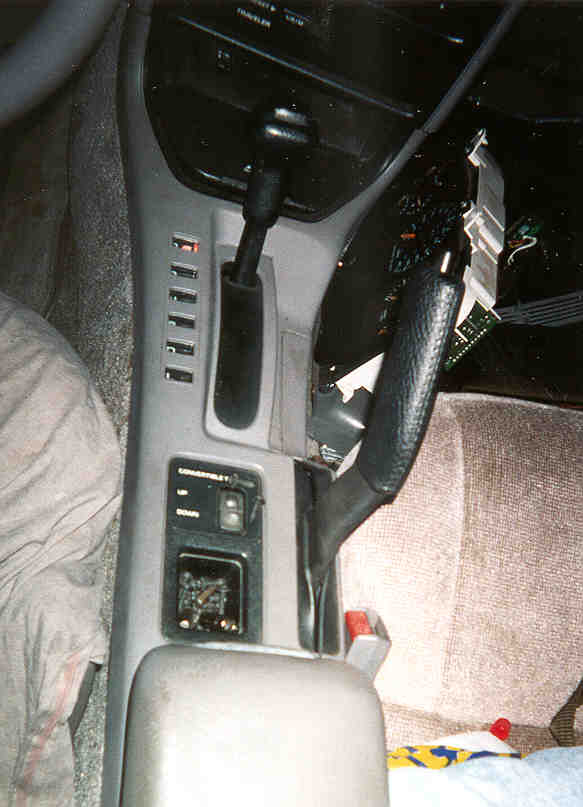
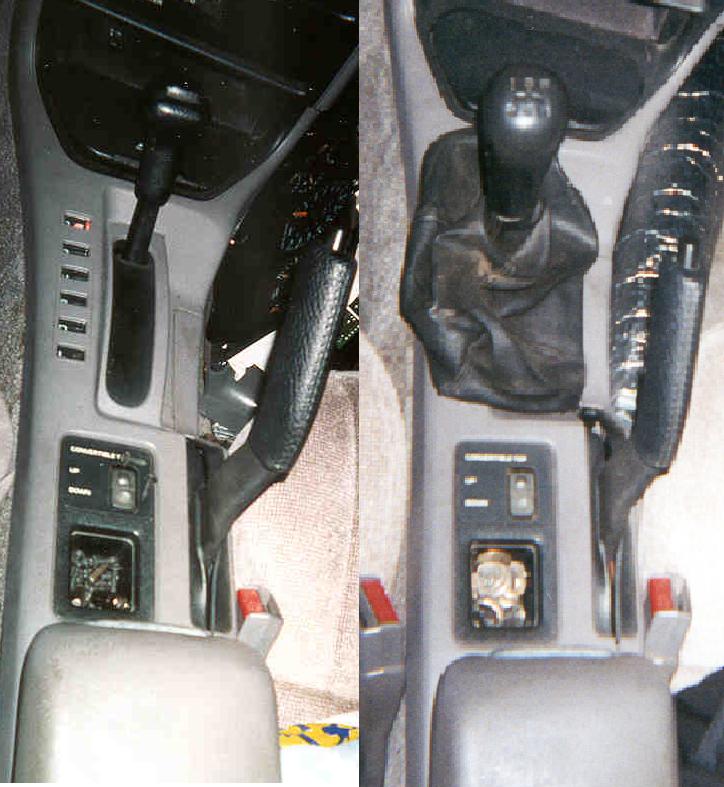
Now if you have a ’90 or newer Lebaron or Daytona cut a hole in the center console for the shifter (see pic) and install it the way it came out(I just left the extra light for the gear selector window floating under the console, just push it out of the way so it doesn’t get crushed).
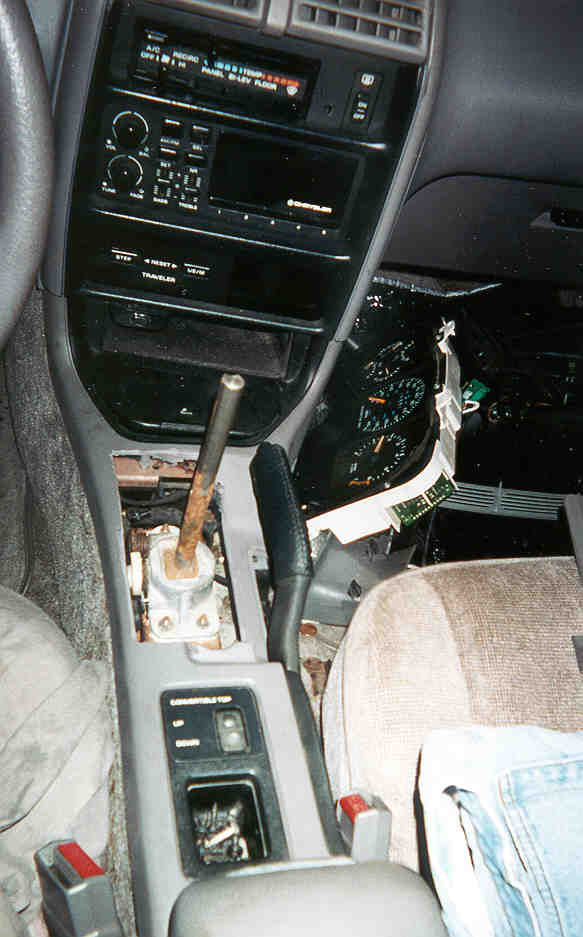
This is the real fun part. Remove the center console. This required taking out screws that hold the little elbow rest box cover on, the screws in that box, the screws that hold the ash tray down, the screws that hold the carpeting up against the console and two screws that are under that carpeting. To get the ash tray out you have to pull it up a little and remove the cigar lighter wires. Also if your car is a Vert stick as many fingers as you can in the coin holder/top switch and tug it up, and unconnect the wiring. To get the shifter knob off I had to use a very small allen wrench to remove the screw that is in the front and pull the knob straight up. Where the shifter goes through the console there will be a little piece of dental floss looking wire, just snip it. There is also a light that goes under the gear selected window, it just pulls out. The center console should be free now just pull it straight up till it clears the shift lever and then remove it from the car.
Now to remove the shifter cable from the shifter and pull it out from under the car. Now take off the 4bolts that hold the shifter down and lift it out of the car.
To put the 5spd shifter in just bolt it down and feed the shifter cables thought the firewall to the shifter and connect them. You will either have to cut your center console or get one from a 5spd car. I cut mine.
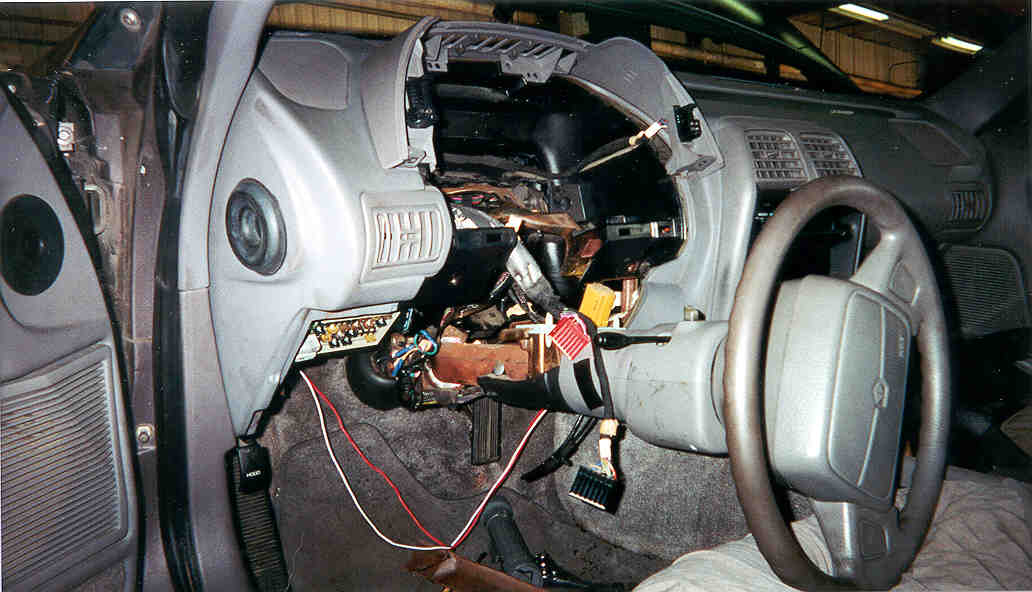
Dash comes all apart for this little operation. If you have the Lebaron or the Daytona there is a cowl that is over the instrument cluster. There are three screws(I think) on the bottom of each side of the Cowl. This frees the underside of the cowl which will come out with a little shimmy and shake(if you have tilt steering wheel, putting the wheel at it’s lowest position will help). Now remove the screws that hold in the instrument cluster and remove that. You can now get at the screws that hold the upper casing of the cowl to the dash. Remove and set aside. Crawl under the dash and remove all the nuts/bolts that hold the pedal in, also take the break booster cable off of the pedal. It won’t come totally loose till later. Now that you have all the bolts/nuts out, go get a flash light and double check. There are several bolts. There are also 2 nuts and 2 bolts that you have to get at from the top. Now, from underneath the dash remove the nuts that hold the steering column up and lower it and gently pull it towards the seat. Your pedal should be loose by now. (See Pic). Check to make sure the break light switch is disconnected and lift/shake/shimmy/etc to get the pedal out. I found it best to turn the steering wheel to the left and take the pedals out to the left(it took me and a buddy, he was shaking the wheel and pedal from above while I was shaking the pedal from below). Once they are out congratulate yourself(this part took me a full day).
Before you put in your new pedals check to make sure that your clutch pedal has a stop on it so it wont go up to the dash(Justin has also informed me that some brake pedals will need a stop, Mine came with both stops in place).
Now put the new pedals in the same way the old one came
out. It is a little tricky because you
have another pedal but it is not real hard.
Now put all the bolts back in and then put the dash back together. Then put the steering column back up. Check your break lamp switch by plugging it
in and having someone behind you watch for the lights to go on when you hit the
breaks. If they stay on push the switch
further in towards the little piece of metal that hangs off the break
pedal. If it wont go in enough you have
to remove that little piece of metal and bend it some(8mm open-ended wrench).
5spd Install
First remove the flex plate(hand full of bolts that go into the crank shaft. Now hold up the fly wheel and turn it until all the bolt holes line up(this scared me at first, the fly wheel only goes on one way If they don’t line up keep on turning until they do:-). Use a torque wrench(~70ft/lbs) and some lock tight.
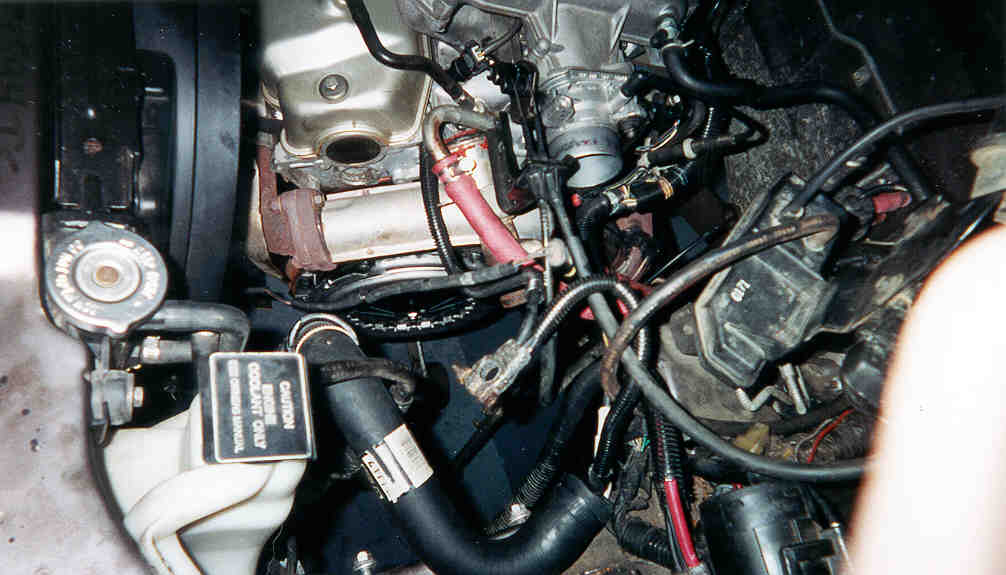
Now a somewhat difficult part. Put the release bearing onto the tranny shaft and then test fit the clutch. Put the clutch and pressure plate onto the flywheel( one two ). Hand tighten the bolts only. Do not use an extension with a socket on it. Have a buddy line up the clutch while you hold it stable. Once it looks centered tighten the pressure plate bolts(recommended way is to get them all hand tight then go around the pressure plate and give each bolt a turn until they are all totally tightened. Then grab a torque wrench and put them all at the recommended tightness.
Remove the hydraulic tranny mount(if equipped). Tranny jack is pretty worthless for this part unless you have no other way to lift it. Me and a buddy were able to crawl under the car and lift it into place. A little shimmy and shake was required to get it into place. Once you think you have it centered have another guy gently push it toward the engine(another way is to hold it up there then have someone turn the crank). If it wont go on and you’re sure it’s where it’s supposed to be have someone turn the crank, then try to push again. One of these times it will go on. From above put in the upper tranny bell house bolts then lift the tranny up so the tranny mount engages the other portion of the mount. Slip that bolt in and tighten it down(you may have to shake the engine/tranny around to get it in there).
Now bolt on the back of the flywheel cover and attach the front engine/tranny mount to the front of the car. Now swing the motor/tranny forward and put in the mount bolts. Attach all the bolts and tighten them down. Now replace the starter and reattach the wires. From above put a ring of RTV or preferred high temp rubber gasket in a bottle to the engine side of the coolant tube that runs into the engine. Check all the tranny/engine bolts.
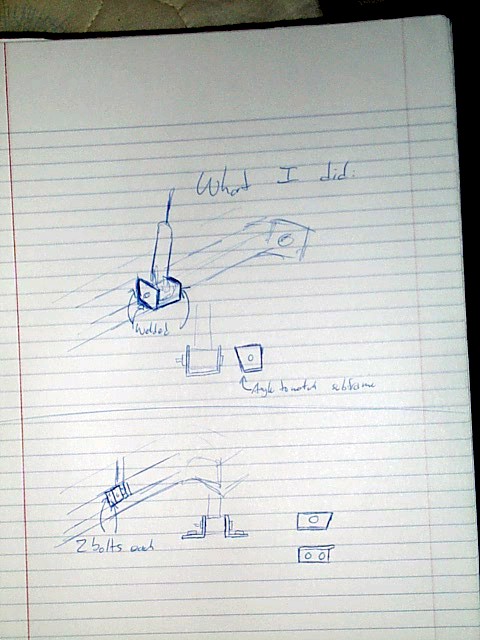
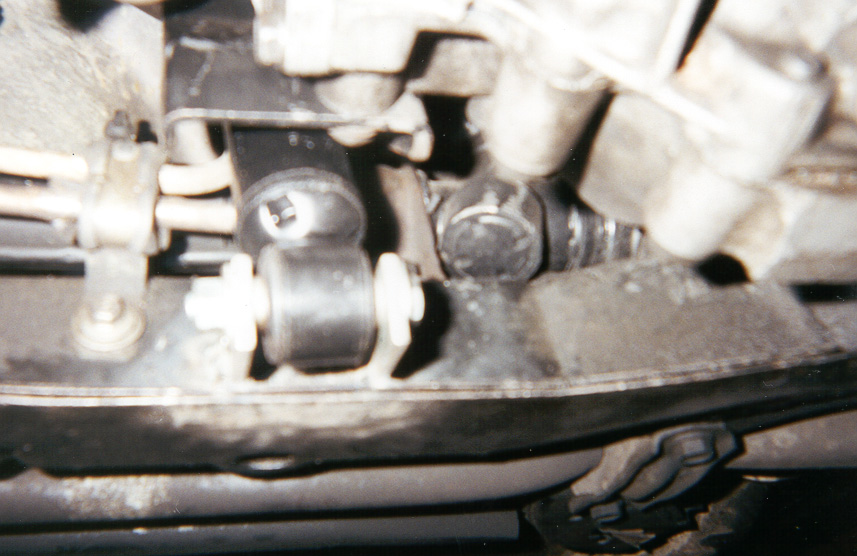
The 2nd transmission mount, that looks like a shock, will have to have a bracket welded on to the cross member. I put the mount on then put the brackets on and clamped them down. Then mark and remove the shock and welded the brackets on(be sure to disconnect the battery if not already done, unless you want to fry your electrical system). After the welding is complete reattach the mount.